
How to setup Netgear EX6150 wifi extender?
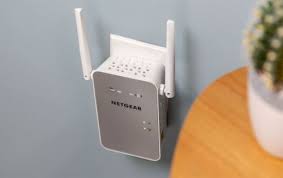
Netgear EX6150 WiFi Extender Setup is a device that extends the range of your existing WiFi network by amplifying the signal and retransmitting it. It is designed to work with any standard WiFi router and can be used to improve the coverage and speed of your wireless network.
The EX6150 supports both the 2.4GHz and 5GHz frequency bands and can deliver speeds of up to 1200 Mbps. It comes with external antennas that can be adjusted to optimise the signal strength, and it also has a Gigabit Ethernet port for connecting wired devices such as gaming consoles, smart TVs, and
Some of the key features of the Netgear EX6150 WiFi Extender Setup include:
- External antennas for increased signal strength and coverage
- Gigabit Ethernet port for connecting wired devices
- Easy setup using the Netgear installation assistant app or web browser
- Compatibility with any standard WiFi router
- Compact design for easy placement
Netgear EX6150 WiFi Extender Setup through a Manual Process
Here’s how to manually set up the Netgear EX6150 WiFi Range Extender:
- First, plug in the range extender and make sure it’s in the same room as your WiFi router.
- Connect a device to the range extender’s WiFi network (such as a laptop or smartphone).
- Open a web browser and go to www.mywifiext.net. If the website doesn’t load, try using the IP address 192.168.1.250 instead.
- Follow the instructions on the screen to set up the range extender. You’ll be asked to choose your home WiFi network and enter its password.
- Once you’ve entered your WiFi network’s details, click “Continue” and wait for the range extender to connect to your router.
- Once the range extender is connected, you’ll be prompted to set up a new WiFi network name (SSID) and password for the range extender. You can use the same network name and password as your home WiFi network, or choose a different one.
- Once you’ve set up the new network name and password, click “Continue” and wait for the range extender to apply the settings.
- Finally, move the range extender to the desired location where you want to extend your wireless network. Make sure it’s placed within the range of your home WiFi network.
Netgear EX6150 WiFi Extender Setup via WPS
Sure, here’s how Netgear EX6150 WiFi Extender setup can be done using WPS:
- First, plug in the range extender and make sure it’s in the same room as your WiFi router.
- Press and hold the WPS button on the Netgear EX6150 WiFi Range Extender for 2 seconds.
- Press the WPS button on your WiFi router.
- Wait for the range extender to connect to your router. The WPS LED on the range extender should light up solid green once the connection is established.
- Once the connection is established, move the range extender to the desired location where you want to extend your wireless network.
That’s it! You’ve now Netgear EX6150 WiFi extender setup can be completed using WPS. You can connect to the range extender’s WiFi network and enjoy extended WiFi coverage in your home or office.
Netgear EX6150 extender firmware update
Here’s how to update the firmware of the Netgear EX6150 WiFi Range Extender:
- First, make sure your range extender is connected to your home WiFi network.
- Open a web browser on a device that’s connected to your home WiFi network, such as a laptop or smartphone.
- In the address bar, enter “www.mywifiext.net” or “192.168.1.250.” This will take you to the Netgear Genie setup page.
- Enter your username and password. If you haven’t set up a username and password before, use the default login credentials (admin for username and password for password).
- After logging in, go to “Settings” and then “Firmware Update.”
- If there’s a firmware update available for your range extender, click on “Download” to download the update.
- Once the update is downloaded, click on “Update” to start the firmware update process.
- Wait for the update process to complete. This may take a few minutes. Do not turn off or unplug the range extender during the update process.
- Once the update is complete, the range extender will reboot automatically.
That’s it! You’ve now updated the firmware of your Netgear EX6150 WiFi Range Extender.
Netgear EX6150 extender setup troubleshooting tips
Sure, here are some troubleshooting tips for setting up the Netgear EX6150 WiFi Extender setup:
- Make sure your range extender is within range of your home WiFi network. If the range extender is too far away from the router, it may not be able to connect.
- Make sure the range extender is plugged in and powered on.
- Double-check that you’ve entered the correct WiFi network name (SSID) and password during the setup process.
- Try resetting the range extender by unplugging it from the power source and plugging it back in after a few seconds. This can sometimes resolve connectivity issues.
- Try connecting to the range extender’s WiFi network using a different device, such as a smartphone or tablet, to see if the problem is with your original device.
- Check for firmware updates for the range extender. If there’s a firmware update available, download and install it.
- If none of the above steps work, try performing a factory reset on the range extender and setting it up again from scratch.
That’s it! Hopefully, these troubleshooting tips will help you resolve any issues you’re having with setting up the Netgear EX6150 WiFi Range Extender.